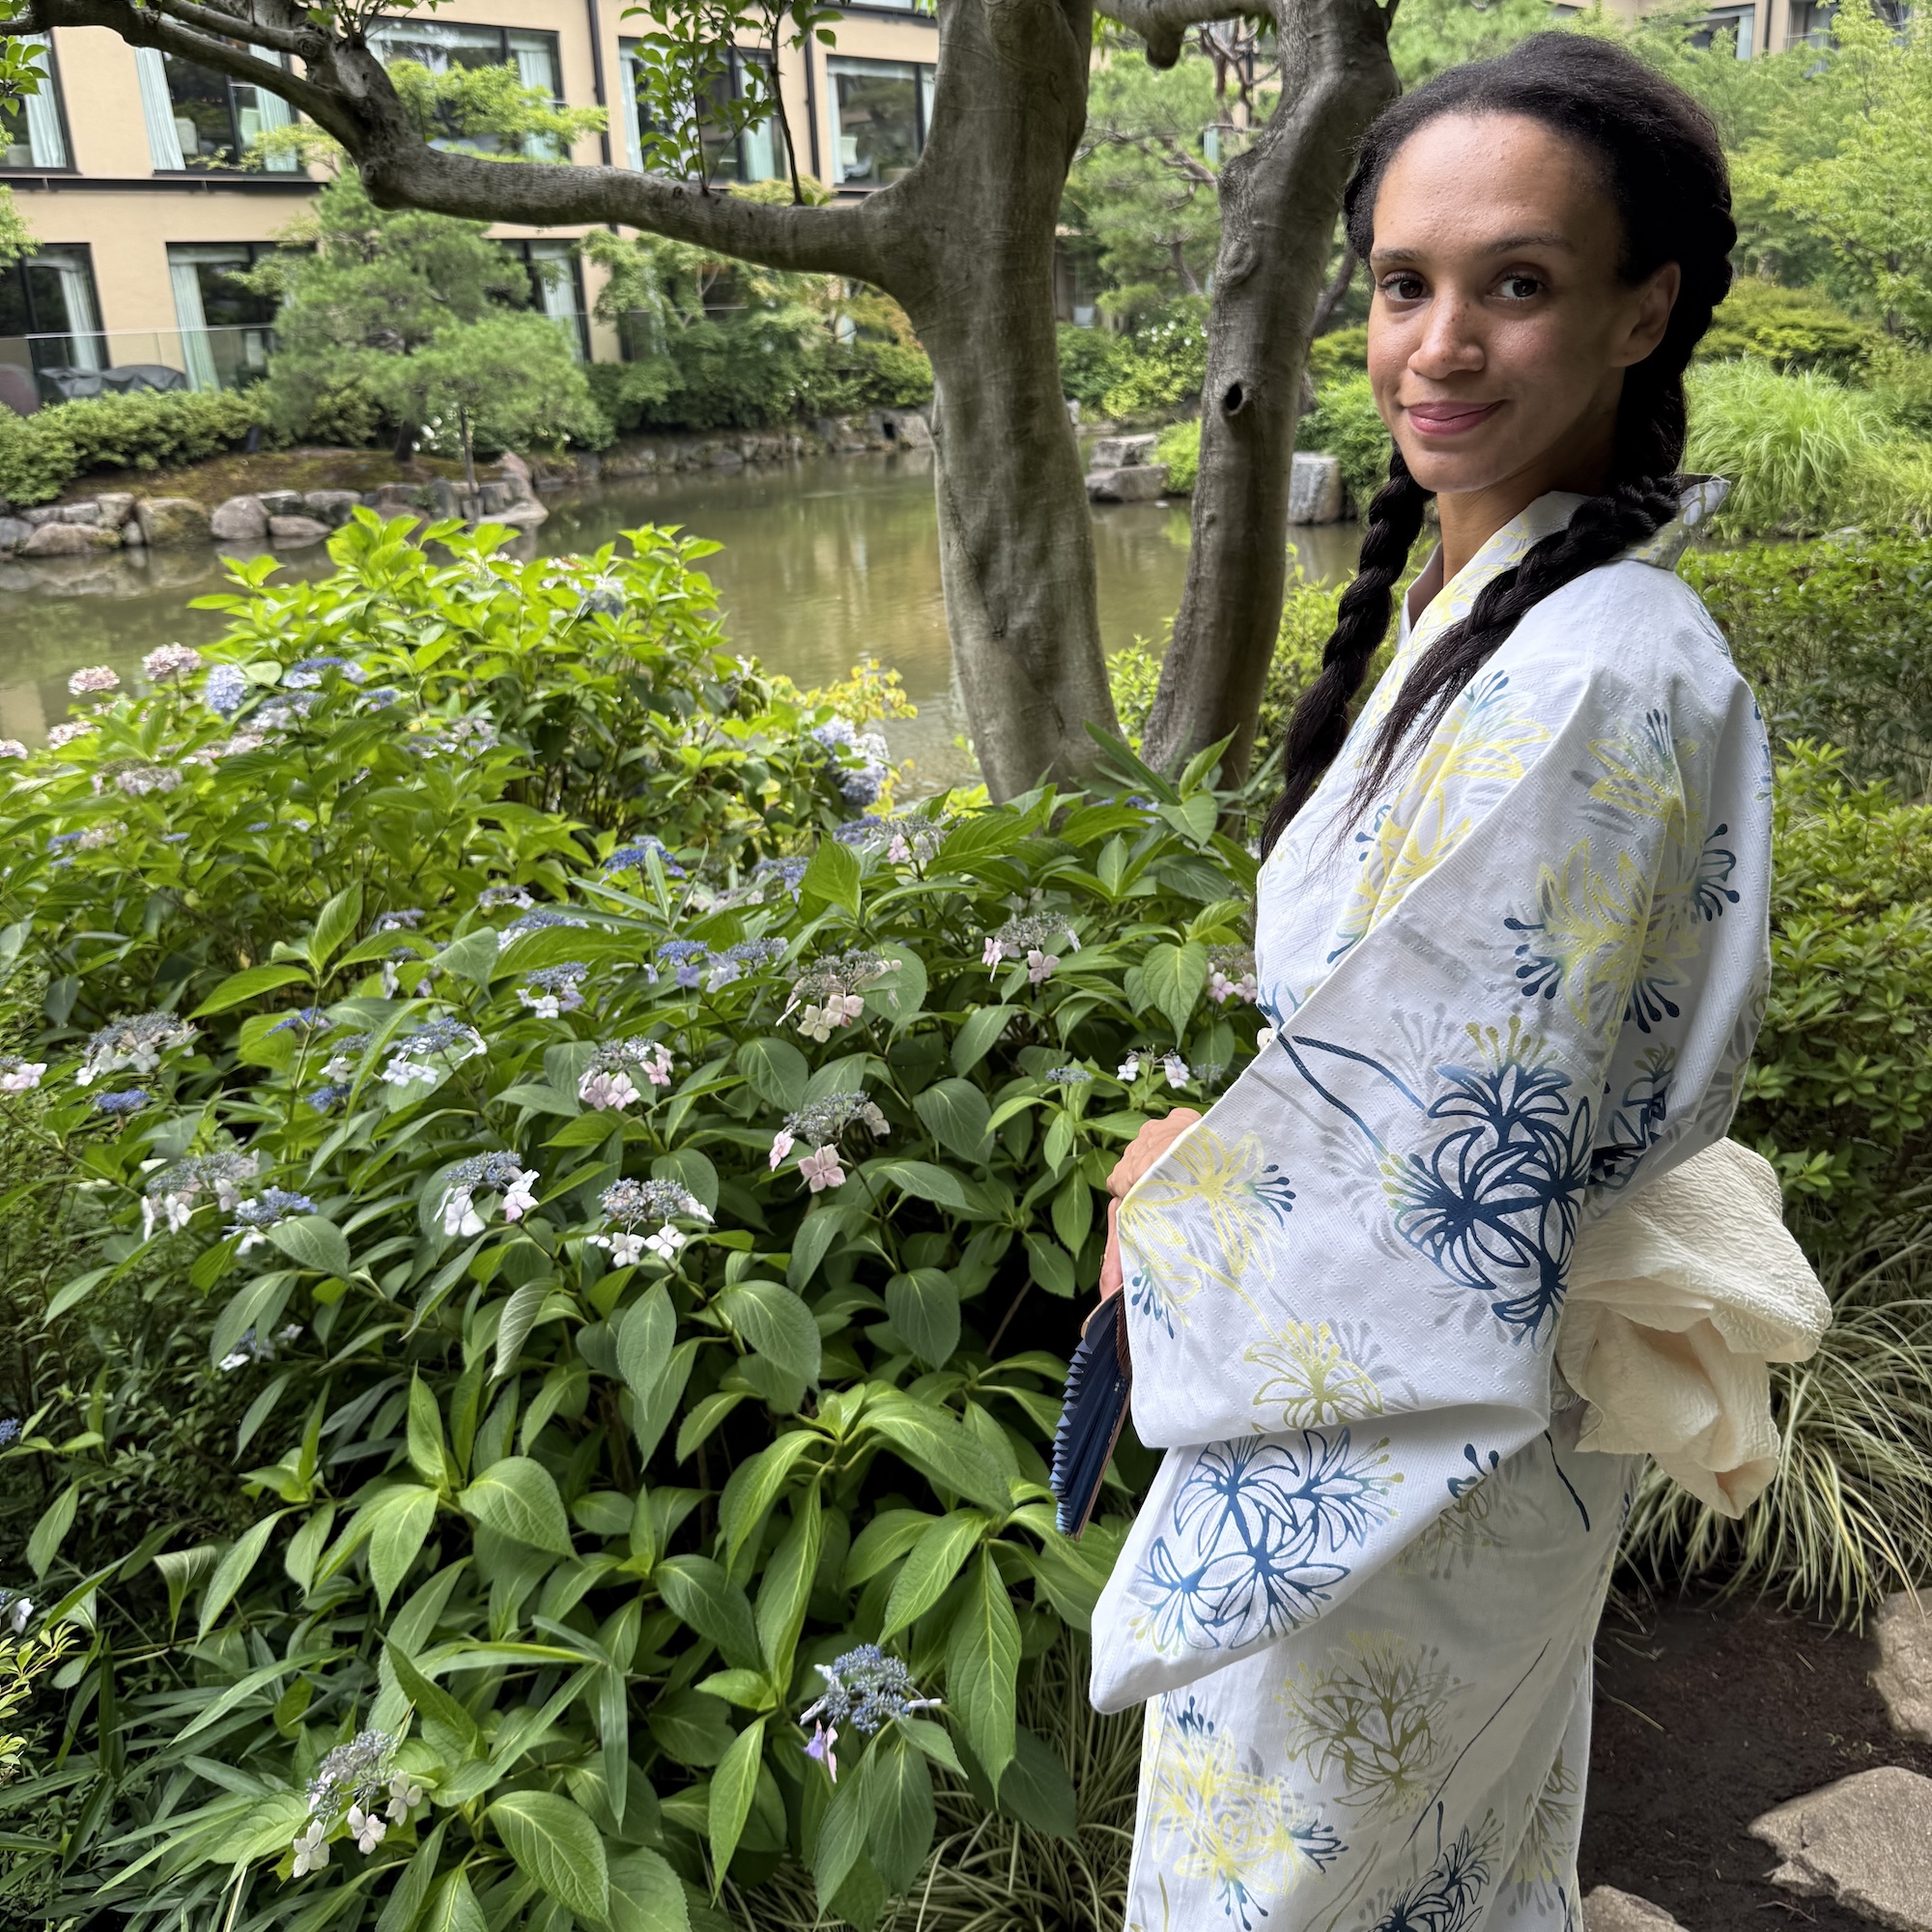
In Tokyo, I had the chance to meet with Cara Harris, a licensed kimono stylist and teacher, who walked me through the art of wearing a yukata—a lightweight, cotton summer kimono that is less formal and more breathable than a traditional silk kimono. If you’ve ever wanted to try one yourself, here’s a detailed guide based on her professional instructions.

What is a Yukata?
A yukata is a casual, unlined kimono typically made of cotton or linen. Unlike heavier silk kimonos, it’s designed for warm weather and is commonly worn to summer festivals, fireworks displays, and hot spring resorts (onsen). Because of its simplicity and comfort, the yukata is often considered an introduction to kimono dressing.
Step 1: Preparation
Slip the obijime (string) through the obidome (pendant) and set aside, and fold the obi (fabric belt) so they’re ready for the last step.
Before putting on the yukata, you’ll start with a kimono slip, a lightweight undergarment that helps the yukata drape smoothly. They can be worn year-round and should not be visible.
Step 2: Adjusting the Length
Slip into the yukata and hold the two ends together at the front. Adjust the fabric by lifting it slightly at the waist to create the right length so that the hem falls neatly at your ankles. The center seam (known as the “lucky center”) should align perfectly in the middle between your feet.
Step 3: Securing with the Koshi-himo
Next, use a koshi-himo, a thin fabric belt, to secure the yukata at your waist. Tie it firmly but comfortably. Smooth out the back and front panels with your hands so the seams align and the fabric lays flat—no bunching or wrinkles.
Step 4: Perfecting the Collar
The collar should form a clean “V” shape at the neckline, with the left panel always crossing over the right (never the other way around, which is reserved for funerals). Smooth the collar with your hands so it sits neatly against the chest.
Step 5: Adding the Obi
The most eye-catching part of the yukata is the obi belt, which secures everything in place and creates a decorative bow at the back. Cara demonstrated a simple method using an elastic aid called a sanju-himo (a cord with three elastics) to hold the bow in shape.
She wrapped the obi around the waist, created loops for the bow, then tucked the ends neatly underneath so nothing showed. The result: a clean, balanced bow tied securely at the back.
Final Touches
Once the obi is in place, tuck away any loose ends inside the folds of the belt. Smooth the fabric once more from shoulders to hem so the yukata drapes elegantly. Add the obidome
Yukata vs. Kimono: What’s the Difference?
- Fabric: Yukata are cotton; kimonos are usually silk.
- Formality: Yukata are casual and summer-friendly; kimonos are formal and season-specific.
- Lining: Yukata are unlined, making them cooler in hot weather.
Following these steps will help you wear a yukata with both authenticity and grace.